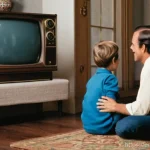
Hey fellow gamers! Ever find yourself scrolling through TikTok or Instagram and suddenly feeling that massive wave of nostalgia hit you, wishing you could just power up your old NES or Sega Genesis?
You’re definitely not alone – retro gaming is absolutely booming right now, with more and more of us diving back into those golden-age titles. But snagging a sweet, used console deal without getting burned can feel like a boss battle in itself.
Don’t sweat it, because I’ve spent countless hours navigating the online marketplaces and dusty flea market stalls, and I’m here to spill all the secrets so you can level up your retro collection smart.
Let’s get you squared away with some solid tips!
Peeking Under the Hood: The Console’s True Condition

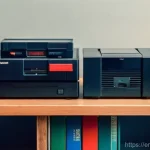
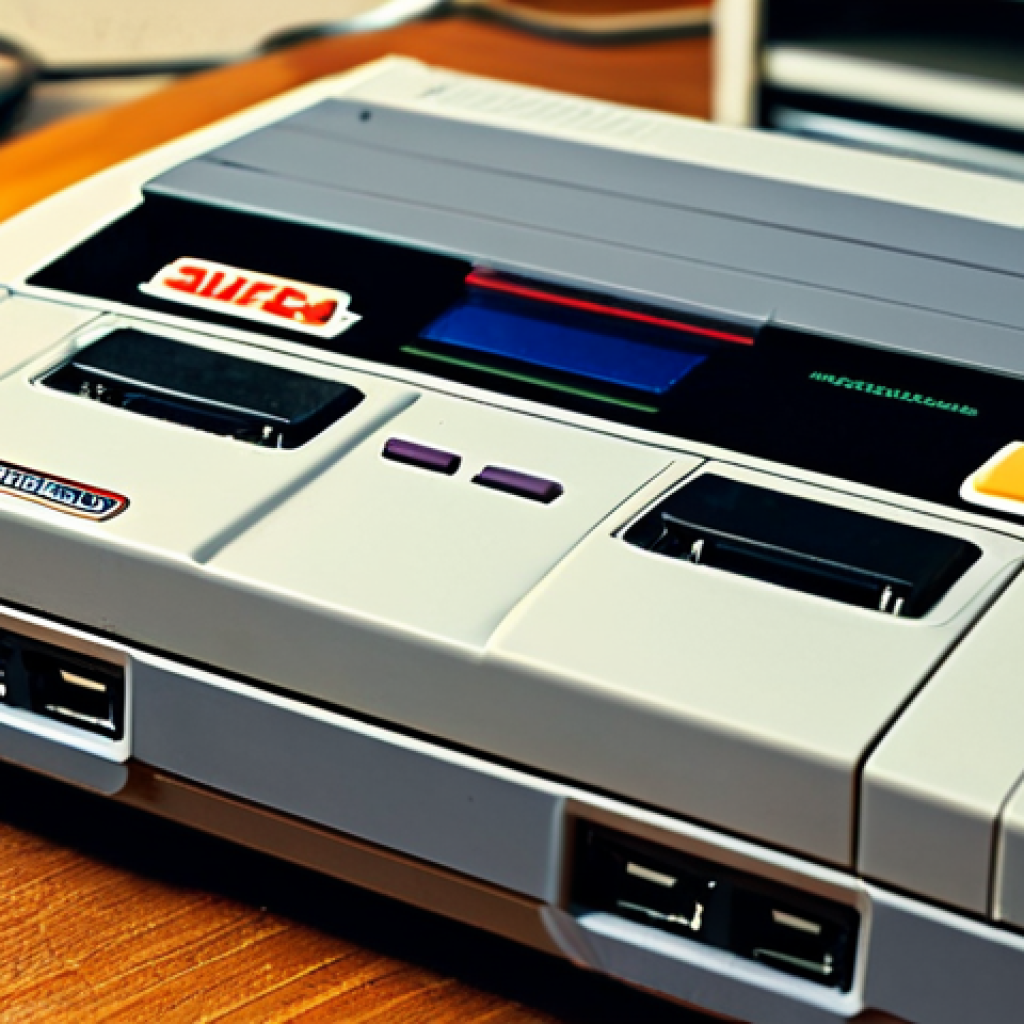
When you’re out there hunting for that perfect vintage console, whether it’s an original Nintendo Entertainment System or a sleek Sega Dreamcast, the first thing you absolutely *have* to do is give it a thorough once-over.
Trust me, I’ve been burned before, excitedly grabbing what looked like a clean SNES from a picture only to find a sticker bomb and a sticky controller port when it arrived.
That gut-wrenching feeling of disappointment is exactly what we want to avoid for you! This isn’t just about aesthetics; it’s about checking the core functionality.
I always start by looking for deep scratches, cracks, or any signs of physical abuse. Does the plastic look yellowed? That’s common with older consoles, especially Super Nintendos, due to UV exposure, and while it might not affect playability, it absolutely impacts resale value and aesthetics for many collectors.
A console that looks like it survived a war usually means it *did* survive a war, and who knows what internal battles it’s still fighting. You’re looking for signs of care, or at least a lack of outright neglect.
Don’t be afraid to pick it up, turn it over, and really scrutinize every angle. This initial visual assessment is your first line of defense against a dud purchase.
It’s the difference between a triumphant unboxing and a regretful return.
Visual Inspection: More Than Skin Deep
Beyond the obvious dents and dings, pay close attention to the ventilation grilles. Are they caked with dust and grime? That’s a huge red flag because it indicates poor airflow, which can lead to overheating and premature component failure.
I once bought a PlayStation 1 that looked decent on the outside, but when I took it home and popped it open, the inside was a literal dust bunny graveyard!
It ran for about ten minutes before freezing. Always check the ports – cartridge slots, controller ports, AV outputs. Are the pins bent or corroded?
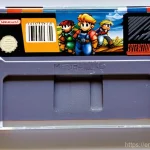
That’s a common issue, especially with cartridge-based systems like the NES or N64. Corrosion on the pins can mean finicky connections, requiring you to blow on cartridges (which, by the way, you should *never* do!) or wiggle them endlessly just to get a game to boot.
Also, give the power and reset buttons a few pushes. Do they feel loose or sticky? These little things add up to a less-than-stellar gaming experience, and sometimes, they’re signs of deeper problems that you just don’t want to inherit.
The Infamous Capacitor Check
This one is a bit more advanced but incredibly crucial for certain consoles. For systems like the Sega Game Gear, TurboGrafx-16, or even some early PlayStation models, leaky capacitors are a notorious issue.
These tiny electronic components can degrade over time, leaking corrosive fluid that can destroy the circuit board. If you’re buying in person and the seller allows, or if you’re comfortable opening up a console you’re seriously considering, a quick peek inside can save you a world of hurt.
You’re looking for any brownish, crusty residue around cylindrical components on the motherboard. Even if you don’t open it, a very faint, sweet, or acrid smell coming from the console can be a sign of failing capacitors.
Trust your nose! It might seem like a small detail, but a console with failing caps is a ticking time bomb and will require costly repairs, often more than the console is worth.
I’ve learned this the hard way with a gorgeous-looking Sega CD that refused to play audio, all thanks to a few tiny, leaky caps.
Where the Treasure Hunts Begin: Top Spots to Scout
Alright, you know what to look for, but where do you actually *find* these retro gems without getting fleeced? The landscape for retro console buying is vast and varied, from the comfort of your couch to the hustle and bustle of a local market.
Each avenue has its own quirks, its own potential pitfalls, and its own incredible scores waiting to be unearthed. My journey has taken me through all of them, experiencing the thrill of a blind online bid and the satisfaction of haggling face-to-face.
It’s a bit like choosing your character class in an RPG – do you prefer the stealthy approach of online research or the brute force of an in-person negotiation?
The key is to be adaptable and to understand the unique dynamics of each marketplace. You’ll find different types of sellers, different pricing structures, and different levels of transparency, so tailoring your approach is crucial.
Don’t pigeonhole yourself into just one hunting ground; spread your net wide for the best chances of success.
Online Marketplaces: Buyer Beware (and Thrive!)
Sites like eBay, Facebook Marketplace, and even specialized retro gaming forums are goldmines, but they come with a caveat: you can’t physically inspect the item.
This means you’re relying heavily on seller photos and descriptions. Always, *always* ask for more photos if the provided ones are blurry or don’t show all angles.
Specifically request shots of the ports, the bottom of the console, and any suspected damage. Read descriptions meticulously for terms like “untested,” “as-is,” or “for parts.” These are polite ways of saying “it probably doesn’t work, don’t blame me.” My best eBay scores came from sellers who provided clear, honest descriptions and multiple high-resolution photos.
Also, check seller ratings and reviews like your life depends on it. A seller with a long history of positive feedback is generally a safer bet, even if their prices are slightly higher.
Remember, a good deal isn’t just about the price; it’s about the assurance of quality and functionality.
Local Flea Markets & Retro Stores: The Hands-On Advantage
Ah, the glory of the local hunt! This is where you can truly put your visual inspection skills to the test. Flea markets, yard sales, thrift stores, and dedicated retro gaming shops offer the invaluable advantage of hands-on examination.
You can pick up the console, feel its weight, check the ports, and sometimes even plug it in for a quick test. Dedicated retro stores are often pricier, but you’re usually paying for their expertise, cleaning, and sometimes even a short warranty, which can be worth the extra cash for peace of mind.
Flea markets and yard sales are where the real bargains are found, but also where the biggest risks lie. Sellers might not know (or care) about the true value or condition of what they’re selling.
This is where your knowledge comes in handy. I once snagged a fully working Sega Saturn with two controllers for a mere $20 at a garage sale because the seller thought it was “just an old DVD player.” Your due diligence pays off immensely in these situations!
Powering Up: Testing the Hardware’s Heartbeat
So you’ve found a promising console – maybe it passed your visual inspection with flying colors, or perhaps it’s from a trusted seller online. Now comes the moment of truth: seeing if it actually works.
This step is non-negotiable, whether you’re at a local seller’s house, a retro store, or unboxing a delivery. Without a proper test, you’re essentially buying a fancy paperweight, and nobody wants that.
I’ve learned that even the most pristine-looking console can hide internal gremlins. Imagine the sheer disappointment of plugging in your newly acquired, seemingly perfect NES, only for the red light to blink endlessly or, worse, nothing at all to happen.
It’s a heartbreaker, right? That’s why being prepared to test every single aspect of the console’s functionality is paramount. Don’t rush this part.
Take your time, test thoroughly, and if something feels off, investigate immediately. This stage is all about confirming that the console isn’t just a pretty face but a fully functional gaming machine ready to whisk you back to your childhood.
Plugging In: The Moment of Truth
Always insist on seeing the console power on. If you’re buying locally, bring your own AV cables and a small portable TV if you need to, just to be absolutely sure.
Plug it in, hit the power switch, and listen. Does it make any unusual noises? Does the power indicator light up?
More importantly, does it display a picture on the screen? Try to boot a game, if possible. For disc-based systems, make sure the disc drive opens and closes smoothly and that it reads discs without excessive noise or struggle.
For cartridge-based systems, insert a game you know works (or have the seller demonstrate with one of theirs) and confirm it loads. For example, with an original Xbox, make sure it doesn’t show the infamous “Error 7” or “Error 12,” which usually indicate hard drive or DVD drive issues.
A successful boot sequence, a clear video signal, and an audible game starting up are all fantastic signs that you’ve got a healthy console on your hands.
Controller & Port Ponderings
Don’t just stop at the console itself; controllers are equally vital and often overlooked. Test every single controller port. Plug in a controller (again, use one you know works if possible) and check if all buttons and directional pads respond.
Are there any sticky buttons? Does the joystick drift? Some consoles, like the N64, are notorious for worn-out joysticks, which can severely impact gameplay.
Make sure the controller cable isn’t frayed or damaged. What about the memory card slots? Can you insert and remove a memory card without issues?
Does the console recognize it? These are critical, as a non-functioning port can render a controller or a save file useless, diminishing your gaming experience.
I nearly missed a faulty controller port on a GameCube once because I only tested the first port. Always test *all* of them. It’s a small extra step that makes a huge difference in ensuring your complete satisfaction.
Decoding the Deal: What’s a Fair Price?
After you’ve done your due diligence and found a console that’s physically sound and fully functional, the next hurdle is pricing. This is where many buyers get tripped up, either paying too much or missing out on a great deal because they’re unsure of its true value.
Knowing what constitutes a “fair” price isn’t just about looking at a number; it’s about understanding the market, the console’s condition, its rarity, and what it typically sells for across various platforms.
I’ve seen identical consoles listed for wildly different prices on the same day, sometimes even within the same hour. The retro gaming market fluctuates, influenced by trends, collector demand, and even YouTube videos featuring specific games or systems.
You need to be armed with current data to negotiate effectively and to confidently pull the trigger on a good buy. Don’t let enthusiasm override your logical assessment of value; a truly smart purchase balances desire with market reality.
Researching Market Value: Your Secret Weapon
Before you even think about making an offer, do your homework. Your smartphone is your best friend here. Look up recently sold listings on eBay for the *exact* console model and condition you’re considering.
Filter by “Sold Items” to see what people are actually paying, not just what sellers are asking. Check dedicated retro gaming price guides online, like PriceCharting.com, which track historical sales data.
These resources give you a strong baseline. Remember that a console with all its original cables, controllers, and packaging (a “CIB” or Complete In Box item) will fetch a significantly higher price than a loose console.
Be realistic about the condition. A “like new” console should command a premium, but a heavily yellowed or scratched one should be priced lower. This table should give you a rough idea of what to look out for in terms of common console pricing factors:
| Factor | Impact on Price | Example |
|---|---|---|
| Console Condition | Major (Mint> Good> Fair> For Parts) | A pristine NES vs. a yellowed, dirty one |
| Inclusions | High (Cables, Controllers, Manuals, Box) | Loose console vs. CIB (Complete In Box) |
| Rarity/Demand | Significant (High Demand = Higher Price) | Standard NES vs. limited edition Famicom Twin |
| Modifications | Varies (Depends on quality & desirability) | Professionally HDMI-modded N64 vs. stock |
The Art of Negotiation: Don’t Be Shy!
With your market research in hand, you’re ready to talk turkey. If you’re buying in person, especially at a flea market or yard sale, negotiation is expected.
Start a little lower than what you’re willing to pay, but don’t lowball so much that you offend the seller. Be polite, highlight any minor flaws you’ve noticed (gently, without being condescending), and then propose your offer.
If they counter, meet somewhere in the middle. Remember, you can always walk away if the price isn’t right. Online, negotiation is a bit different.
On eBay, you might use the “Best Offer” feature. On Facebook Marketplace, a direct, respectful message about price can go a long way. I’ve found that offering cash-in-hand for local pickups can sometimes sweeten the deal, leading to a lower price or even some free games thrown in.
The worst they can say is no, but often, they’re willing to budge, especially if they see you’re a serious and informed buyer.
Beyond the Console: Must-Have Accessories & Games
Congratulations, you’ve snagged your dream console! But don’t stop there. A console without its essential accessories is like a car without wheels – you might have the engine, but you’re not going anywhere.
And what’s a gaming system without games? The true joy of retro gaming often comes from the full package: the unique controllers, the specific cables that unlock the best visuals, and of course, the iconic titles that defined an era.
This is where you really start building out your collection and personalizing your retro setup. Neglecting these crucial components can lead to frustration, or worse, a less-than-authentic experience.
I’ve seen countless gamers get a great deal on a console only to realize they forgot to budget for a decent set of AV cables or a memory card, which then adds unexpected costs.
Think of it as preparing your battle station; every piece plays a role in your ultimate gaming success.
Essential Gear: Cables, Controllers, and More
First up, cables! Most retro consoles originally came with composite (red, white, yellow) cables. While functional, they often provide a blurry image on modern TVs.
For a cleaner picture, look into S-Video, Component, or even RGB (SCART) cables, depending on your console and TV. These can significantly enhance your visual experience.
Next, extra controllers. You’ll definitely want more than one for multiplayer fun, and having a spare is always a good idea in case one goes bad. Original, first-party controllers are almost always superior to third-party alternatives in terms of build quality and responsiveness.
Don’t forget memory cards for systems that require them (PS1, N64, GameCube, etc.). There’s nothing worse than getting to the end of a long RPG and realizing you can’t save your progress!
Power adapters are also crucial; ensure you have the correct voltage and amperage to avoid damaging your system. A wrong power supply can literally fry your console.
Starting Your Game Library: Iconic Picks
Now for the fun part: games! Everyone has their own favorites, but there are certain “must-play” titles that truly define each console generation. For the NES, classics like *Super Mario Bros.
3*, *The Legend of Zelda*, and *Metroid* are absolute essentials. If you’re into the SNES, *A Link to the Past*, *Super Metroid*, and *Chrono Trigger* are often cited as some of the greatest games ever made.
For Sega Genesis fans, *Sonic the Hedgehog 2* and *Streets of Rage 2* are iconic. Don’t feel pressured to buy everything at once; start with a few beloved titles and gradually expand your collection.
Look for games in good condition, especially cartridge labels and disc surfaces. Scratched discs or torn labels can detract from the collecting experience.
Also, consider the specific genres you enjoy. If you’re a JRPG fan, focus on those; if you love platformers, prioritize those. The beauty of retro gaming is rediscovering these timeless experiences, so pick games that genuinely excite you!
Safeguarding Your Investment: After the Purchase
You’ve done it! You’ve navigated the tricky waters of retro console buying and emerged victorious with a fantastic new (old) system. But the journey doesn’t end there.
To ensure your beloved console continues to bring you joy for years to come, proper care and maintenance are absolutely vital. Think of it as preventative medicine for your electronics.
Skipping this step is like buying a classic car and never changing the oil; eventually, it’s going to break down. These machines are often decades old, and while they were built tough, time takes its toll.
Ignoring basic upkeep can lead to frustrating malfunctions, costly repairs, or even irreversible damage. My own experience with a pristine Sega Genesis taught me this: I was so excited to play it that I neglected to clean the cartridge slot regularly, and eventually, games stopped booting reliably.
A little bit of effort goes a long, long way in preserving your precious retro hardware and keeping those nostalgic memories alive.
Proper Cleaning & Maintenance
First off, a thorough cleaning is in order. Use isopropyl alcohol (90% or higher) and cotton swabs for cleaning cartridge slots, controller ports, and any sticky residues on the console’s exterior.
For disc drives, a lens cleaning kit can work wonders. Never spray liquid directly onto the console; always apply to a cloth first. Compressed air is great for clearing out dust from vents and internal components, but be careful not to hold the can too close or tilt it, which can release propellant.
If you’re comfortable, opening the console to gently dust the internals with a soft brush is highly recommended, especially for older systems that have accumulated years of grime.
Beyond initial cleaning, make it a habit to clean your games before inserting them and to keep the console covered when not in use to prevent dust accumulation.
This simple routine can prevent a myriad of common issues and extend the life of your hardware significantly.
Storage Solutions for the Long Haul
How and where you store your retro consoles and games is just as important as how you clean them. Exposure to extreme temperatures, humidity, or direct sunlight can be incredibly damaging.
Yellowing plastics (like those on many SNES consoles) are often a result of UV exposure. Keep your consoles in a cool, dry place, away from windows and heat sources.
For games, especially cartridge-based ones, invest in dust covers or clear plastic protectors to keep them safe from physical damage and dust. Store discs in their original cases or in high-quality disc wallets to prevent scratches.
Avoid stacking consoles directly on top of each other, as this can impede ventilation and scratch surfaces. Proper storage not only preserves the physical condition of your collection but also helps maintain its value over time.
Treat your retro gear with the respect it deserves, and it will reward you with countless hours of gaming bliss.
Wrapping Things Up
And there you have it, fellow retro gaming enthusiasts! Our deep dive into the sometimes-treacherous, but always rewarding, world of acquiring vintage consoles comes to a close. I truly hope that all the insights, the little tricks I’ve picked up over the years, and even my own painful blunders, will equip you with the confidence and knowledge needed to make your next retro console purchase a resounding success. Remember, this isn’t just about buying old electronics; it’s about reconnecting with a piece of history, reliving cherished memories, and creating new ones. The thrill of firing up a console from your childhood, seeing that familiar logo splash across the screen, and hearing those iconic startup sounds – that’s a magic that’s truly unmatched. Don’t rush the process, enjoy the hunt, and most importantly, treat these historical artifacts with the care and respect they deserve. Happy gaming, and may your pixels always be perfectly aligned!
Useful Information to Keep in Mind
When you’re knee-deep in the retro console world, there are always a few extra bits of knowledge that can really level up your experience and save you a headache or two down the line. Here are some nuggets of wisdom I’ve gathered:
1. Consider Modern Display Solutions: If you’re planning to connect these old beauties to a modern HDTV, don’t just rely on the standard composite (yellow, red, white) cables. Invest in an upscaler like an OSSC or a RetroTINK. These devices can take the console’s original low-resolution signal and transform it into a crisp, vibrant image on your big screen, often without any noticeable lag. It truly makes a world of difference, turning blurry pixels into sharp, defined retro art!
2. Dive into Online Communities: Seriously, these are goldmines. Whether it’s subreddits like r/retrogaming, specialized forums, or Discord servers dedicated to specific consoles, you’ll find an incredible wealth of information, troubleshooting tips, modification guides, and even local buying/selling opportunities. Plus, connecting with other enthusiasts can be a ton of fun – it’s like having a global retro gaming club at your fingertips!
3. Regional Lockouts are Real: Be aware of regional differences, particularly NTSC (North America, Japan), PAL (Europe, Australia), and NTSC-J (Japan). Games and consoles from different regions might not be compatible without modifications. A PAL NES game won’t play on an NTSC console without a converter or mod, for example. Always double-check the region of both your console and any games you buy to avoid disappointment.
4. Explore Modification Options: Many classic consoles can be modded to improve their performance or compatibility. This could range from simple region-free mods to more complex internal HDMI output upgrades or capacitor replacements. While it often requires specialized tools and skills, a professionally modded console can offer a superior experience, prolonging its life and enhancing gameplay. Just ensure you find a reputable modder if you’re not comfortable doing it yourself.
5. Don’t Forget About Storage Expansion: For consoles like the Sega Dreamcast or PlayStation 2, consider looking into modern storage solutions. Options like ODEs (Optical Drive Emulators) for disc-based systems or SD card adapters for consoles that used proprietary memory cards can be game-changers. They allow you to play games directly from an SD card or hard drive, reducing wear and tear on original disc drives and providing a vast, convenient game library. It’s a fantastic way to preserve your physical media while still enjoying your collection.
Key Takeaways
Navigating the exciting world of retro console acquisition can feel like a quest, but armed with the right knowledge, you’re set to conquer it. Based on all my years of experience, here are the absolute core principles I live by when adding to my collection. Think of these as your retro buying commandments:
First and foremost, prioritize thorough inspection and testing. This is your primary defense against bad purchases. Visually check every angle, every port, every button, and if possible, power it on and test it with a game and a controller. Don’t let a glossy photo fool you; the devil is always in the details, and a working console is worth its weight in gold.
Secondly, arm yourself with market knowledge. Before you even think about handing over your hard-earned cash, know what a fair price looks like. Use online resources to check recently sold listings for consoles in similar condition. Understanding the market value empowers you to negotiate effectively and to spot genuinely good deals from overpriced duds.
Next, don’t shy away from negotiation, especially in person. While you won’t always get a discount, a polite, informed negotiation, particularly at flea markets or yard sales, can often shave a few dollars off the price or even net you some bonus accessories. Being prepared to walk away is always your strongest negotiation tool.
Moreover, think beyond just the console itself. Remember to budget for essential accessories like the correct AV cables (upgraded ones if possible!), extra controllers, and memory cards. A console is only as good as the setup it’s connected to, and having everything you need ensures you can jump straight into the gaming action without any frustrating delays.
Finally, commit to proper care and maintenance. Once you’ve brought your new (old) console home, give it a good clean, store it appropriately away from harsh conditions, and maintain it regularly. These machines are often decades old and need a little love to keep them running for years to come. Your diligence in cleaning and storage directly translates into the longevity and enjoyment of your treasured retro investment.
Frequently Asked Questions (FAQ) 📖
Q: So, where’s the absolute best spot to snag a retro console without emptying my wallet or getting totally scammed?
A: Oh man, this is the million-dollar question, isn’t it? Trust me, I’ve seen it all – from incredible steals at garage sales to total rip-offs on obscure online forums.
The “best” place really depends on what you’re looking for and how much effort you’re willing to put in, but I’ve definitely got my go-to’s that have served me well over the years.
For sheer variety and the thrill of the hunt, online marketplaces like eBay are a double-edged sword. On one hand, you can find almost anything, from a pristine, boxed Super Nintendo to a beat-up but working original Xbox.
I’ve personally scored some amazing deals by patiently bidding on auctions that end at weird hours or by setting up saved searches for rare items. The key here is patience and vigilance.
Always, and I mean always, check seller ratings, read reviews, and scrutinize every single photo. If there are only blurry pics or the description is super vague, that’s a huge red flag for me.
I’ve learned the hard way that a seller who can’t be bothered to take good photos might also not be bothered to test their console properly. Plus, eBay’s buyer protection is generally pretty solid, which adds a layer of reassurance that you don’t always get elsewhere.
Then there’s Facebook Marketplace or Craigslist. These can be goldmines for local pick-ups, meaning you save on shipping and can actually inspect the console in person before handing over your cash – which, in my experience, is invaluable.
I once found a fully functional Nintendo 64 with a stack of games for like $50 on Facebook Marketplace because the seller just wanted it gone! But you’ve gotta be smart here.
Always meet in a public place, bring a friend if you can, and definitely bring a way to test the console (more on that in Q2!). The downside is you often have to wade through a lot of junk, and you’re dealing with individual sellers who might not know (or care) about the console’s actual value or condition.
It’s more of a wild west, but the potential for a truly amazing deal is there. Don’t forget local retro game stores, flea markets, and even garage sales.
While local stores often charge a bit more because they’ve done the testing and cleaning for you, they offer reliability and expert advice. Sometimes it’s worth paying a little extra for peace of mind and supporting a local business.
Flea markets and garage sales, on the other hand, are pure treasure hunts. I still remember the adrenaline rush of finding a perfectly working Sega Genesis tucked away at a dusty yard sale for a mere ten bucks – the kind of story you tell your grandkids!
These are less reliable but can yield the most satisfying finds if you’re willing to dedicate a Saturday morning to exploring. Specialized online forums or subreddits (like r/gameswap or r/retrogaming) can also be fantastic, as you’re dealing with fellow enthusiasts who often take better care of their gear, but always do your due diligence on reputation.
It’s all about matching the risk to the reward, and knowing what you’re willing to compromise on!
Q: I’m pretty stoked to buy a classic console, but how can I be sure it actually works before I hand over my hard-earned cash? I’m terrified of buying a dud!
A: Oh, I totally get that fear! There’s nothing worse than getting home with your “new” retro console, plugging it in, and… nothing.
Or worse, the dreaded blinking red light of death! I’ve been there, staring at a blank screen, feeling my hopes crumble like a poorly designed Jenga tower.
Over the years, I’ve developed a pretty strict routine for checking out used consoles, especially when buying in person, and even what questions to ask when buying online.
This isn’t just about saving money; it’s about saving yourself the heartbreak and hassle of a faulty system. First things first: physical inspection is key.
Don’t be shy! Pick up the console, turn it over, look at every angle. Are there any deep scratches, cracks, or signs of impact?
Does it smell weird – like smoke or mildew? That’s a huge “nope” for me. Check the ports for bent pins or corrosion; the cartridge slot, controller ports, and AV outputs are notorious for wear and tear.
If it’s a disc-based system like a PlayStation 1 or Dreamcast, gently open and close the disc tray a few times. Does it feel flimsy? Does it catch?
This is often an early sign of a failing mechanism. Now, for the absolute most crucial step: always, always, always try to test it if you’re buying in person.
I can’t stress this enough. If the seller says, “Oh, I don’t have a TV hookup right now,” or “It worked last time I checked, a few years ago,” that’s a massive red flag flapping in the wind.
A legitimate seller who stands by their product should have no problem letting you power it up. Bring your own small, portable monitor and the necessary cables (AV, HDMI if it’s modded, power supply) if you need to.
I keep a little “retro test kit” in my car for flea market excursions, complete with a small CRT TV and a common game cartridge for whatever console I’m hunting for.
When you test it, check for:
Power On: Does it actually turn on without any weird noises or smells? Video Output: Does a clear picture come through?
No flickering, strange colors, or lines? Audio Output: Can you hear the game sounds clearly? Controller Input: Plug in a controller and make sure all buttons and the D-pad/joystick respond correctly in-game.
Don’t just press them on the menu; actually play for a minute! Game Loading: If it’s a cartridge system, does it read the game on the first try? If it’s disc-based, does it read the disc quickly and without excessive grinding or clicking noises?
Try loading into a game level to ensure it doesn’t freeze. If you’re buying online, you can’t physically test it, so ask for video proof. Seriously.
I always request a short video of the console powering on, loading a game, and demonstrating the controller working. A good seller won’t mind, and if they push back, it’s a signal to move on.
Ask specific questions: “When was the last time you played this?” “Are there any known issues with the controller ports?” “Has it ever been repaired?” The more questions you ask, the more you learn, and the better you can gauge the seller’s honesty and the console’s condition.
Trust your gut – if something feels off, it probably is. It’s better to pass on a deal than to end up with a very expensive paperweight.
Q: Okay, so I’m ready to dive in! But how do I know what’s a ‘fair’ price for a retro console? I don’t want to overpay, but I also don’t want to miss out on a good deal.
A: Figuring out the “right” price for a retro console can feel like trying to hit a moving target, especially with how much the market fluctuates! One day a console might be reasonably priced, and the next, some viral TikTok video sends its value skyrocketing.
I’ve definitely kicked myself for passing on a deal only to see the price double a year later, and conversely, I’ve paid too much because I was impatient.
The key here is research and perspective. First off, condition is king. A console that’s “barely used, in box” (CIB – Complete In Box) is going to fetch a significantly higher price than a “console only” unit that’s a bit dinged up.
We’re talking hundreds of dollars difference for some systems! Personally, I usually aim for a “good working condition, console only” unit unless it’s a system I’m truly passionate about displaying, because I care more about playing the games than having a collector’s showpiece.
The best way to get a baseline for current market values is to check sold listings on eBay. Don’t just look at what sellers are asking for – anyone can ask for a million dollars!
Look at what items actually sold for. Filter by “Sold Items” and “Completed Items” to see real transaction data. Websites like PriceCharting.com are also fantastic resources; they aggregate sold data from various sources and give you a fairly accurate average price for loose, complete, and new consoles and games.
I use it all the time to quickly check if a flea market price is a rip-off or a steal. Now, for avoiding overspending:
1. Set a Budget: Before you even start looking, decide how much you’re really willing to spend on that particular console.
Stick to it. It’s so easy to get caught up in the excitement and just click “Buy It Now.”
2. Compare, Compare, Compare: Don’t just buy the first one you see.
Look at multiple listings on eBay, Facebook Marketplace, and even check local game stores (though their prices will likely be higher, they can still give you an idea of the top-end value).
You might find someone selling for less simply because they need cash quickly. 3. Factor in Shipping: Online purchases often have hefty shipping fees, especially for heavier consoles.
Always add that to the total price you’re comparing. A slightly cheaper console with expensive shipping might end up costing more than a slightly more expensive console with free shipping!
4. Be Patient: This is probably the hardest tip to follow, but it’s the most effective. Good deals appear constantly, but they often get snatched up quickly.
If you miss one, another will come along. Don’t let FOMO (Fear Of Missing Out) make you pay over market value. I’ve waited months for the right deal on a specific system, and the satisfaction of getting it at a fair price was so much better than the regret of overpaying.
5. Haggle (Nicely!): Especially in person at flea markets, garage sales, or even on Facebook Marketplace, a little polite negotiation can go a long way.
“Would you consider $X?” or “I’d be willing to pick it up right now for $Y” can often knock a few dollars off the price, especially if you’re buying multiple items.
Just remember to be respectful; a friendly approach usually works better than an aggressive one. Ultimately, a “fair price” is also what you are willing to pay for the joy and nostalgia that console brings.
But by doing your homework, being patient, and knowing the market, you can ensure you’re making a smart investment in your retro gaming journey without feeling like you got played!
📚 References
Wikipedia Encyclopedia
구글 검색 결과
구글 검색 결과
구글 검색 결과
구글 검색 결과
구글 검색 결과